Tutorial: Developing WordPress Themes Locally with XAMPP
As you can probably tell by now, I am a fan of WordPress. It's easy to install and style and supported by a great community of developers. It has come a long way from being used strictly as a blogging platform to become one of the most intuitive, feature-filled open-source content management systems (CMS) on the web.
Many people - even non-techies - have heard of WordPress. Most simply set it up on their web host, choose a theme, and start adding content. That's all fine and well, but to make custom themes and significant configurations of a site -- or to develop any type of higher level site than the photos-of-my-cats-type-news -- you must develop on your computer locally before putting anything on a web host. It's simply more efficient than making changes one at a time to a web-hosted site and you also avoid exposing unforeseen errors and glitches to the browsing public.
At the top of my local web development environment list is XAMPP. XAMPP is an open-source Apache installation that contains all of the tools necessary for WordPress development right on your computer - without having to FTP your site files to a web server or even be connected to the Internet. In other words, XAMPP is a virtual web server on your computer.
The following tutorial explains how to set up XAMPP so you can get right down to the nitty-gritty and start theming your sites in WordPress. Let's get to it.
What I'll be using:
- Notepad++ (text editor)
- Firefox (browser)
Step 1: Download XAMPP
Go to http://www.apachefriends.org/en/xampp.html and download XAMPP for your platform. Since I am currently on a Windows machine, these instructions will apply primarily to Windows, although it will apply (for the most part) to installation on any platform.
Step 2: Install XAMPP
Locate the download file and run the installation. By default, XAMPP installs to your main *C:* hard drive. I would not recommend changing this location since I have run into problems when trying to install it to a sub-directory in the past.
Step 3: Turn on XAMPP
If XAMPP has not automatically launched, find the XAMPP icon in your Program Files list and click to open it. A control panel dialog window will open. Next to the Apache and MySQL modules, click the Start button. Wait a few seconds for it to start running. When XAMPP is running, the control panel will look like this:
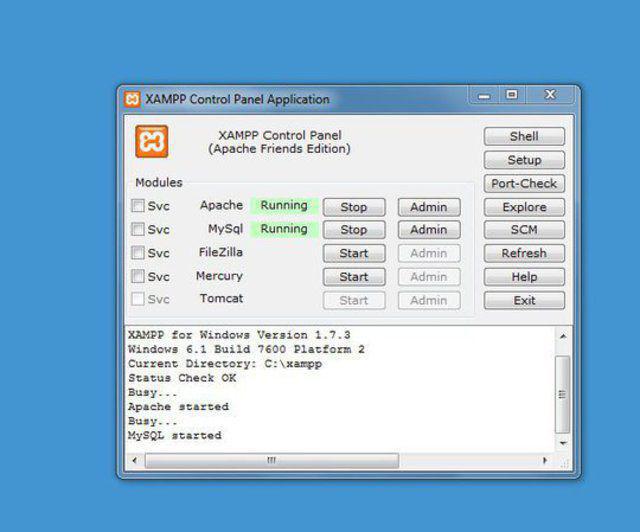
NOTE: If you have a problem getting the Apache to start running, follow the directions at the end of this post to change the port for XAMPP.
Step 4: Download WordPress
Go to http://www.wordpress.org and download WordPress. As of the date of this post, the version is 3.2.1. It will be saved as a ZIP file or TAR.GZ.
Step 5: Copy the WordPress folder to HTDOCS
Locate the download and unpack it. You should now see a single folder named wordpress in your destination folder.
On a Windows machine, unless you chose a different installation directory, the HTDOCS directory will be located at C://xampp/htdocs. It will contain a directory named xampp and a couple of index files. Do not erase them.
The HTDOCS directory is where all the action happens. It is the equivalent of the root directory of your web server. Copy the wordpress folder here.
Step 6: Rename the folder
Since you can have multiple sites in HTDOCS, rename the wordpress folder to something identifiable with your site. For simplicity I'll refer to the wordpress folder as the mysite folder from now on.
Step 7: Create a database
Open your browser of choice and type "http://localhost/xampp" in the location bar. This will load the XAMPP dashboard, which looks like this:
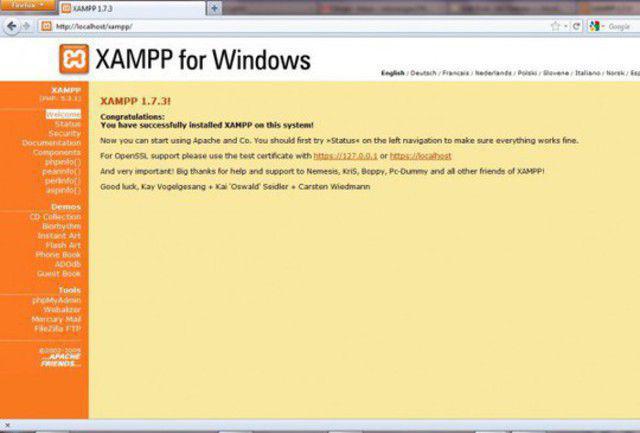
In the left side, click the link for phpMyAdmin. This is the PHP-based tool that allows you to interact with your local MySQL database built into XAMPP. On the dashboard, you will see a field to Create New Database. Enter a database name in the box and click Create. Unless you know what you're doing, ignore the Collation and Interface options.
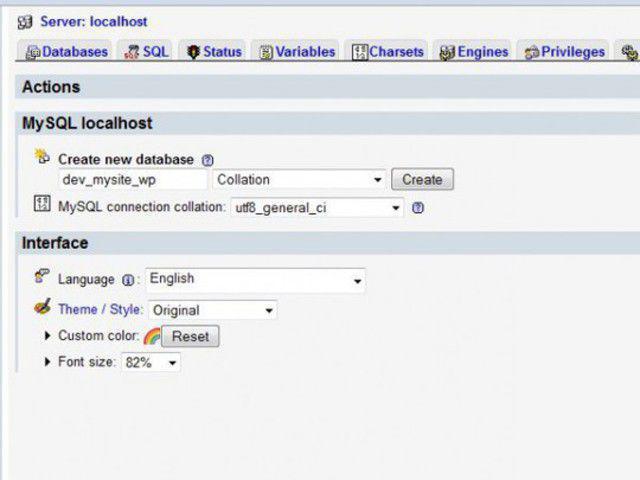
For now, the database will be empty.
You can use whatever database name you like. I tend to use the convention TYPE_SITENAME_PLATFORM so that **_dev_mysite_wp_** tells me it is the development WordPress database for MySite. This is important because you may use several databases for different aspects of a multi-dimensional website. It is also important to know whether the data is dummy development or staging data or real production data when the file is sitting somewhere as an exported SQL file.
Step 8: Create the config file
In the mysite folder, you will see a file called wp-config-sample.php. Copy and paste this file in the same directory and rename it to wp-config.php. Open the wp-config.php file with your favorite text editor (I use Notepad++). Locate the code that defines the MySQL settings:
// ** MySQL settings - You can get this info from your web host ** // /** The name of the database for WordPress */ define('DB_NAME', 'database_name_here')
/** MySQL database username */ define('DB_USER', 'username_here')
/** MySQL database password */ define('DB_PASSWORD', 'password_here')
/** MySQL hostname */ define('DB_HOST', 'localhost')
The user should be root and the password should be empty. The hostname will remain localhost. So now the settings should be:
// ** MySQL settings - You can get this info from your web host ** // /** The name of the database for WordPress */ define('DB_NAME', 'dev_mysite_wp')
/** MySQL database username */ define('DB_USER', 'root')
/** MySQL database password */ define('DB_PASSWORD', '')
/** MySQL hostname */ define('DB_HOST', 'localhost')
You should note that the database name I used is dev_mysite_wp. You should change it to the database name you selected.
Step 9: Run the WordPress install
Open your browser and point it to http://localhost/mysite/. You should be redirected to the WordPress installation page that looks like this:
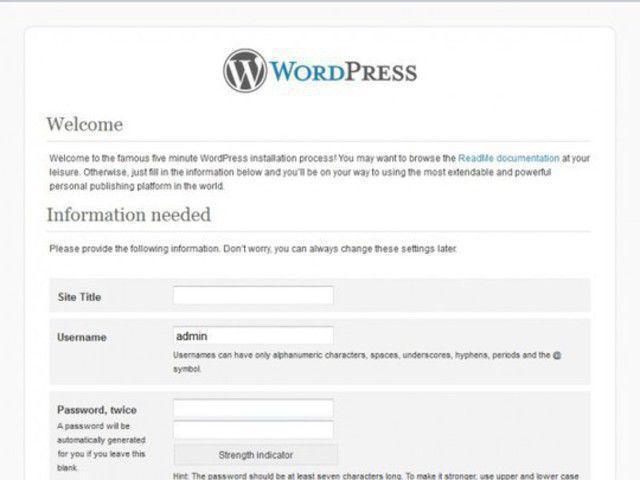
Fill out the form with your Site Name, Username, Password, and Your Email. The option to "Allow my site to appear in search engines like Google and Technorati" does not matter since the local installation will not be visible online. Click the "Install WordPress" button. You should be directed to a Success! page.
Click the "Log In" button and enter the Username and Password you just selected. You should be redirected to the WordPress dashboard.
Step 10: Create a Working Theme
In the mysite folder, open the wp-content/themes folder. This is where all of your themes are located for easy activation. If you are building your own theme, you may want to start from scratch or use a child theme. I will typically use a cleaned-up minimalist blank theme I created myself or sometimes an existing theme.
As the date of this post, the WordPress installation comes with two default themes: Twenty Ten and Twenty Eleven. To develop your own theme using one of these themes as the starting point, follow these steps:
- Copy one of these themes (twentyten or twentyeleven) and paste it into the same themes directory.
- Rename the copied folder to mytheme (or any theme name you would like to use).
- In the mytheme folder, open the style.css file
- At the top of the file, you will see the commented line for the theme name:
Theme Name: Twenty Eleven. Change this to:Theme Name: MyTheme(or the theme name that you used)
Step 11: Activate your new theme
In the dashboard located at http://www.{your-site}.com/wp-admin, go to Appearance --> Themes from the menu bar in the left column.
Locate the MyTheme theme and click Activate. When you return to your home page, your site will look like the theme you used as the base. As you develop, the changes will be immediately visible, and you will always have the base themes to fall back on.
Step 12: Start editing your theme
Working with the themes and styling them is beyond the scope of this post. You can read more about theming from the WordPress site from the links below:
- http://codex.wordpress.org/Using_Themes
- http://codex.wordpress.org/Theme_Development
- http://codex.wordpress.org/Child_Themes
Cheers!
IF YOU HAVE PROBLEMS GETTING APACHE TO RUN
A common problem occurs if port 80 is already taken by another program - for example, IIS or Skype. In this situation, you must change the port that XAMPP uses. Follow these steps:
- Open the httpd.conf file located in the **_C:\xampp\apache\conf\ _**directory with Notepad++ or your favorite text editor
- Search for "Listen 80" and change it to "Listen 85"
- Search for "ServerName localhost:80" and change it to "ServerName localhost:85"
- Save the changes
You must also change the port being used for the secure sockets layer (SSL).
- Open the httpd-ssl.conf file located in the *C:\xampp\apache\conf\extra*
- Search for "Listen 443" and change it to "Listen 4499"
- Search for "<VirtualHost default:443>" and change it to "<VirtualHost default:4499>"
- Search for "ServerName localhost:443" and change it to "ServerName localhost:4499"
- Save the changes
Restart XAMPP, re-open the XAMPP control panel and try clicking the Start buttons for Apache and MySQL.
Now, in each instance when I refer to http://localhost, use http://localhost:85 instead. For example, to get to the index of mysite, go to http://localhost:85/mysite instead.